 Skip to content
Chocolate crinkle cookies are a delightful treat that brings joy to holiday celebrations and everyday indulgences alike. Known for their fudgy centers, crackly powdered sugar coating, and rich chocolate flavor, these cookies are both a visual and culinary delight. In this article, you’ll discover everything you need to create the perfect *Chocolate Crinkle :The Ultimate Guide to Making Delicious Chocolate Crinkle Cookies
1: Introduction to Chocolate Crinkle Cookies
What are Chocolate Crinkle Cookies?
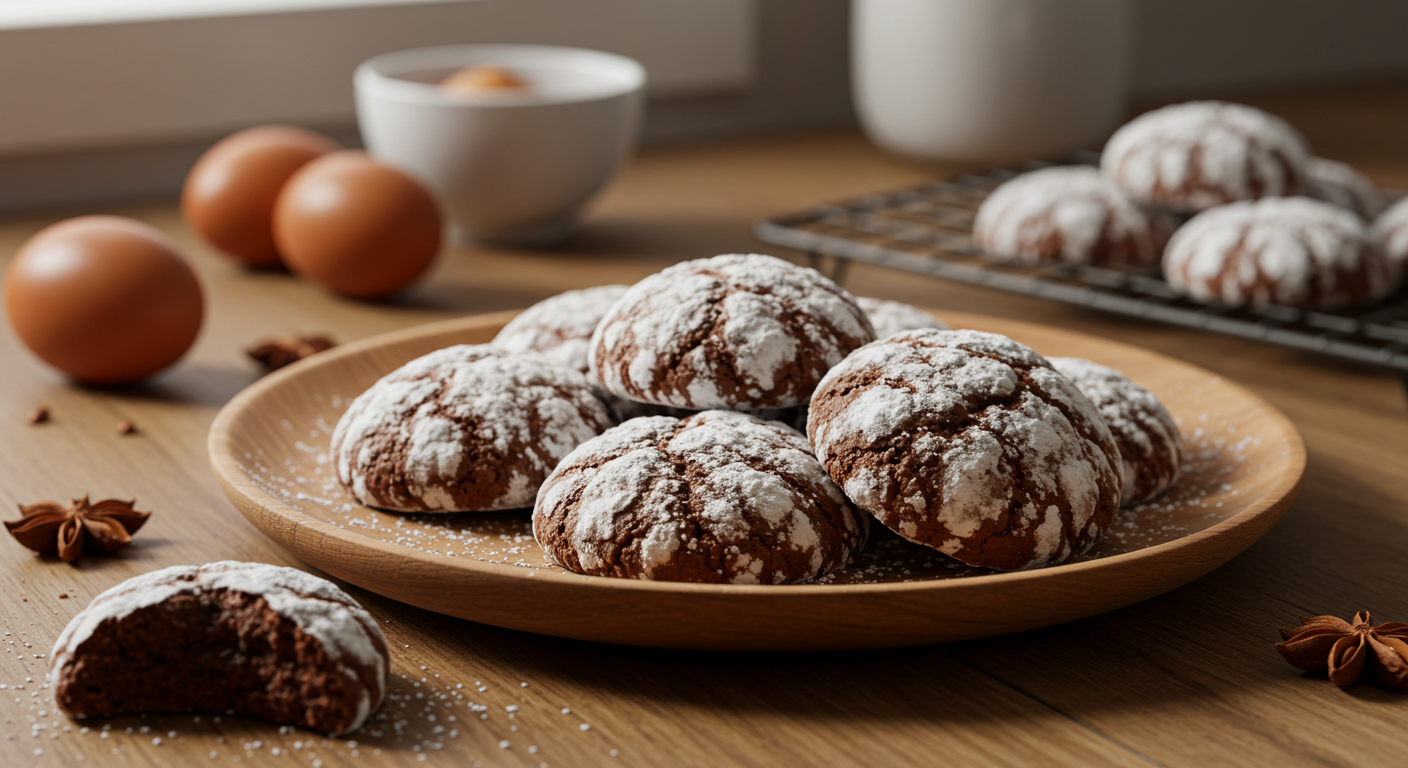
Chocolate Crinkle Cookies are undeniably one of the most iconic and beloved cookie varieties. These decadent treats boast a rich, fudgy chocolate center encased in a delicate, powdered sugar shell. The signature “crinkle” effect is achieved through a unique dough-making process, resulting in a visually stunning and irresistibly tempting cookie.
History of Chocolate Crinkle Cookies
While the exact origins remain somewhat shrouded in mystery, it’s believed that Chocolate Crinkle Cookies emerged in the mid-20th century. Some culinary historians suggest they may have evolved from German chocolate cake, while others point to influences from traditional European desserts. Regardless of their precise lineage, these cookies quickly gained popularity, captivating cookie lovers with their unique appearance and irresistible flavor.
Popularity and Variations of Chocolate Crinkle Cookies
Today, Chocolate Crinkle Cookies remain a perennial favorite at bake sales, holiday gatherings, and coffee breaks. Their popularity has spawned countless variations, with bakers experimenting with different types of chocolate, adding nuts, incorporating spices, and even introducing vibrant colors. From classic dark chocolate to indulgent white chocolate versions, the versatility of this recipe knows no bounds.
2: Essential Ingredients for Chocolate Crinkle Cookies
Key Ingredients and Their Role
Every delectable Chocolate Crinkle Cookies recipe begins with the right ingredients. Let’s dive into the essentials and how each contributes to the cookies’ unique texture and taste:
- Cocoa Powder: This is the star of the show, giving the cookies their rich, chocolatey depth. Opt for unsweetened natural cocoa powder to achieve a perfectly balanced flavor.
- Powdered Sugar: This ingredient is responsible for the iconic crinkled appearance. As the cookies bake, the sugar crystallizes, forming a crackly, sweet exterior.
- All-Purpose Flour: Ensures the cookies hold their shape while maintaining their soft, chewy center.
- Eggs and Oil: Eggs act as a binder, while oil keeps the cookies moist and tender, creating that melt-in-your-mouth texture.
- Baking Powder: The leavening agent that helps the dough rise, creating those signature cracks on the surface.
Tips for Selecting Quality Ingredients
When preparing a Chocolate Crinkle Cookies recipe, quality matters:
- Always choose fresh, high-grade cocoa powder for maximum flavor.
- Sift your powdered sugar to avoid clumps, ensuring a smooth coating.
- Use room-temperature eggs to help the dough blend seamlessly.
Pro Tip: Experiment with flavored oils, like coconut or hazelnut, for a creative twist!
Part 3: Step-by-Step Guide to Making Chocolate Crinkle Cookies
Preparation and Mixing the Dough
Perfecting the dough is the first step to success:
- Combine Dry Ingredients: In a large bowl, whisk together cocoa powder, flour, baking powder, and a pinch of salt. This ensures even distribution of all components.
- Incorporate Wet Ingredients: In a separate bowl, beat eggs, sugar, and vanilla extract until creamy. Gradually add oil while mixing to achieve a smooth texture.
- Bring It Together: Slowly fold the dry mixture into the wet ingredients until a thick, sticky dough forms.
Shaping and Coating the Cookies
- Chill the Dough: Refrigerate for at least two hours or overnight. This makes it easier to handle and enhances the flavor.
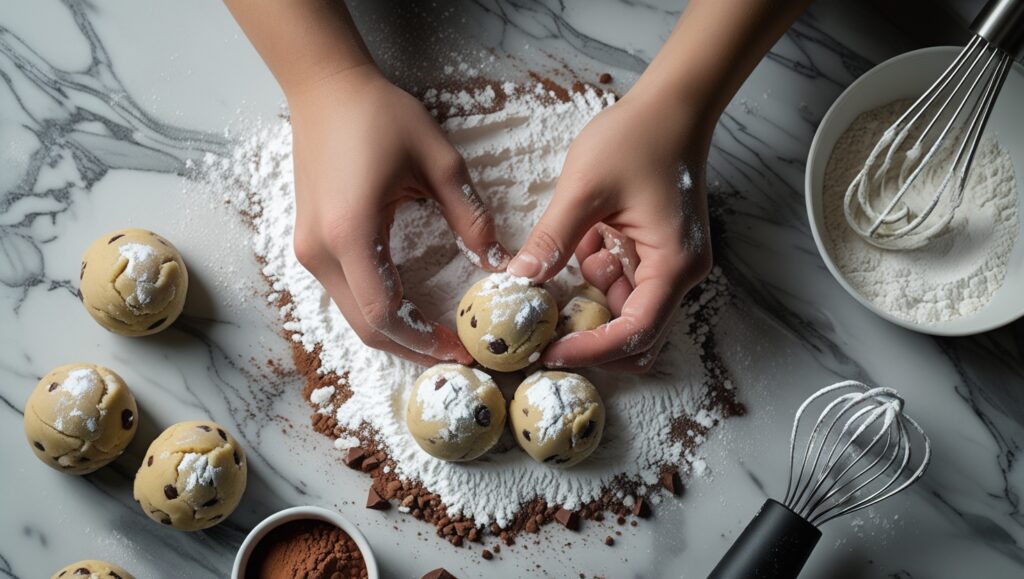
- Form the Cookies: Use a spoon or cookie scoop to portion out dough. Roll into small balls, ensuring uniform sizes for even baking.
- Coat Generously: Roll each ball in powdered sugar until fully covered. This is crucial for achieving the classic crinkle effect.
Baking the Cookies to Perfection
- Preheat the Oven: Set your oven to 350°F (175°C). Line baking sheets with parchment paper for easy cleanup.
- Bake: Place the cookies 2 inches apart and bake for 10–12 minutes. Keep a close eye—cookies should appear set on the edges but remain soft in the center.
- Cool and Enjoy: Let the cookies cool on the baking sheet for 5 minutes before transferring to a wire rack.
By following these steps, you’ll bake cookies that are not only picture-perfect but also bursting with fudgy chocolate flavor.
For more dessert inspiration, check out this guide to puff pastry desserts, which pairs beautifully with crinkle cookies for a festive treat!
2: Essential Ingredients for Chocolate Crinkle Cookies
Key Ingredients and Their Role
Creating the perfect Chocolate Crinkle Cookies recipe starts with understanding the role of each ingredient. Here’s what makes these cookies irresistibly good:
- Cocoa Powder: This is the foundation of the cookie’s deep chocolate flavor. For the best results, use natural, unsweetened cocoa powder. It gives the cookies their rich, indulgent taste.
- Powdered Sugar: Essential for the cookies’ crackly appearance, powdered sugar forms a sweet, crisp coating as the cookies bake.
- All-Purpose Flour: This stabilizes the dough, ensuring the cookies hold their shape while keeping a soft and chewy interior.
- Eggs: These act as a binding agent, bringing all the ingredients together seamlessly.
- Vegetable Oil: Unlike butter, oil creates a moist, tender texture that makes every bite melt in your mouth.
- Vanilla Extract: Adds a subtle sweetness and depth, complementing the chocolate flavor beautifully.
Tips for Selecting Quality Ingredients
When working on your Chocolate Crinkle Cookies recipe, using high-quality ingredients can make all the difference:
- Choose premium cocoa powder for a bold, chocolatey taste.
- Sift powdered sugar before rolling the dough to ensure a smooth coating and avoid clumps.
- Use room-temperature eggs for better mixing and a more consistent dough.
For another fantastic recipe idea, check out this guide to banana bread using two bananas for a quick and delicious dessert!
3: Step-by-Step Guide to Making Chocolate Crinkle Cookies
Preparation and Mixing the Dough
The secret to a great Chocolate Crinkle Cookies recipe lies in preparing the dough just right:
- Mix the Dry Ingredients: In a bowl, whisk together cocoa powder, flour, baking powder, and salt. This step ensures all the dry components are evenly distributed.
- Combine Wet Ingredients: In another bowl, beat the eggs with sugar until pale and creamy. Gradually add oil and vanilla extract while mixing to create a smooth blend.
- Combine Wet and Dry: Slowly fold the dry mixture into the wet ingredients. The dough will be thick and sticky, which is perfect for these cookies.
Shaping and Coating the Cookies
- Chill the Dough: Refrigerate the dough for at least two hours. Chilling not only makes the dough easier to handle but also enhances the flavor.
- Form the Cookies: Scoop the dough using a spoon or cookie scoop. Roll into small, uniform balls for even baking.
- Roll in Powdered Sugar: Coat each dough ball generously in powdered sugar. This is what gives the cookies their signature crackled look.
Baking the Cookies
- Preheat the Oven: Heat the oven to 350°F (175°C) and line a baking sheet with parchment paper.
- Bake: Arrange the cookies on the sheet, spacing them 2 inches apart. Bake for 10–12 minutes. The edges should be firm, but the centers should remain soft.
- Cool and Enjoy: Allow the cookies to cool on the baking sheet for 5 minutes, then transfer them to a wire rack to cool completely.
Pro Tip: For a fun twist, you can add a hint of peppermint extract to the dough for a festive holiday vibe!
Need more dessert inspiration? Check out this guide to puff pastry dessert recipes for ideas to pair with your crinkle cookies.
4: Variations and Creative Twists
Adding a Peppermint Twist
If you want to give your Chocolate Crinkle Cookies recipe a festive spin, adding a touch of peppermint is the way to go. Simply substitute 1 teaspoon of vanilla extract with peppermint extract. The result? A cookie that tastes like a chocolate peppermint patty, perfect for the holiday season! For extra flair, sprinkle crushed candy canes on top before baking.
Double Chocolate Crinkle Cookies
Because who doesn’t love more chocolate? To make these cookies even richer, mix in ½ cup of chocolate chips or chunks into the dough. The melty bits of chocolate inside each cookie add an indulgent layer to this already decadent treat.
Gluten-Free or Vegan Alternatives
No one should miss out on these cookies, so here’s how to make them more inclusive:
- For a gluten-free version, use a 1-to-1 gluten-free flour blend.
- To make them vegan, swap out the eggs for a flax egg (1 tablespoon flaxseed meal + 3 tablespoons water per egg). Use dairy-free chocolate chips if you’re adding extras.
Looking for another cookie recipe to try? For more delicious options, check out our cookie mix cake recipe. It’s a creative twist on classic cookies!
5: Troubleshooting Common Problems
Why Aren’t My Crinkle Cookies Crinkling?
A common issue when baking crinkle cookies is a lack of the signature crackle. This happens when the dough is too warm. Always chill the dough for at least two hours to ensure it stays firm enough to hold its shape. Another culprit? Insufficient powdered sugar coating. Don’t skimp on the sugar—generous coverage is key to achieving the classic crinkled look.
Dealing with Sticky or Dry Dough
If your dough is too sticky to handle, it likely hasn’t been chilled long enough. Pop it back in the fridge for another hour. On the other hand, if the dough feels dry, it might be overmixed or have too much flour. Add a tablespoon of vegetable oil to restore moisture.
Preventing Overbaking
Overbaked crinkle cookies lose their chewy center and become dry. To avoid this, remove the cookies as soon as the edges are set but the center still looks soft. They’ll continue to firm up as they cool.
For even more helpful tips on achieving baking success, explore our guide on Boston cream cake. It’s packed with tricks for perfecting desserts!
6: Chocolate Crinkle Cookies FAQ
What Is the Secret to a Crunchy Cookie?
The secret to achieving a crunchy exterior in your Chocolate Crinkle Cookies recipe lies in the baking time and the amount of powdered sugar. Make sure to coat each cookie generously with powdered sugar before baking. For a crispier texture, extend the baking time by 1–2 minutes, but keep a close eye to avoid overbaking.
Why Are My Crinkle Cookies Not Crinkling?
If your cookies lack the iconic cracks, the dough might not have been chilled long enough. Chilling ensures that the cookies spread slowly, allowing the cracks to form. Another reason could be insufficient baking powder, which helps create the cracks. Always check the freshness of your leavening agents before starting.
What Makes Cookies Chewy vs. Crunchy?
Chewy cookies typically have a higher moisture content, often achieved with more eggs or oil. On the other hand, crunchy cookies result from a longer baking time and less moisture in the dough. For the perfect balance, the Chocolate Crinkle Cookies recipe uses vegetable oil for chewiness while baking them just long enough to retain a soft center.
How Many Calories Are in a Chocolate Crinkle Cookie?
On average, a single chocolate crinkle cookie contains around 90–120 calories, depending on the size and ingredients used. If you add extras like chocolate chips, expect a slight increase in the calorie count.
7: Storing and Serving Suggestions
How to Store Chocolate Crinkle Cookies
To keep your Chocolate Crinkle Cookies recipe fresh, store them in an airtight container at room temperature. They’ll stay soft and delicious for up to a week. If you’d like to enjoy them longer, freeze the baked cookies or the dough for up to three months. Simply thaw and bake whenever the craving strikes!
Best Ways to Serve Crinkle Cookies
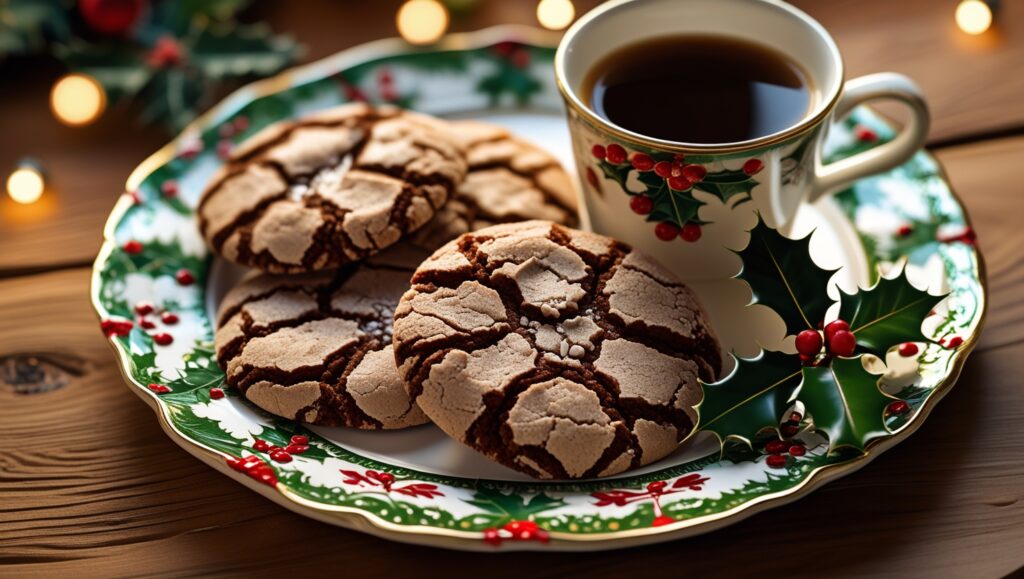
These cookies are perfect as a standalone treat, but they pair wonderfully with a glass of cold milk or a warm cup of coffee. For a festive twist, serve them on a dessert platter with other holiday favorites like sugar cookies or peppermint bark.
Need more ideas for serving desserts? Check out our guide to peach cobbler using cake mix for another crowd-pleaser!
8: Fun Facts and Popular Questions About Crinkle Cookies
Origins of the “Crinkle” Effect
The signature crackled look of crinkle cookies isn’t just a happy accident—it’s a result of a perfectly balanced dough. When the chilled dough hits the oven, it spreads slowly, allowing the powdered sugar coating to split and form beautiful cracks. This process highlights the chewy interior and crispy exterior, which are hallmarks of the Chocolate Crinkle Cookies recipe.
Interestingly, the technique of rolling cookies in powdered sugar has been around for decades, but crinkle cookies became widely popular in the mid-20th century as a festive treat for the holidays.
Chocolate Crinkle Cookies Around the World
While crinkle cookies are a staple in American kitchens, variations exist worldwide. In some cultures, the cookies are flavored with spices like cinnamon or nutmeg to give them a warm, aromatic twist. Other regions use different coatings, such as granulated sugar, to create a slightly crunchier texture. No matter where they’re made, these cookies are loved for their rich chocolate flavor and eye-catching design.
9: Conclusion
Chocolate crinkle cookies aren’t just a dessert—they’re a tradition that brings people together. This Chocolate Crinkle Cookies recipe combines the best of taste, texture, and visual appeal, making it a must-have for any occasion. Whether you’re baking for the holidays, hosting a cookie exchange, or simply craving something chocolatey, these cookies never disappoint.
As you explore the joy of baking crinkle cookies, don’t hesitate to experiment with different flavors or add-ins to make them uniquely yours. For more ideas to expand your baking repertoire, be sure to check out our collection of dessert recipes and create your own sweet memories.
Happy baking! 🍪
